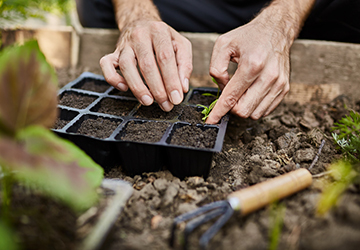
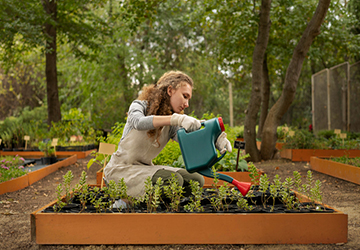
Do you want to start your garden but need more yard space? Don't worry; you can have a thriving garden with raised bed gardening. Raised beds are the perfect solution for small yards or balconies. They give you complete control over the growing environment and allow you to pack more plants into a small space.
Building a raised bed is easy and can be done on a weekend. It would help to have lumber, stakes, and essential tools. Once created, you'll have an instant garden ready for planting. A raised bed will produce bigger and better harvests, reduce weeds, and give you healthier soil that warms up earlier in the spring. Your garden will become the envy of all your neighbors as they see how productive a small space can be.

The Ultimate Hacks to Build a Raised Bed!
If you want to build a raised bed garden, it is easier than you think! You can now effortlessly make it.
1.Build A Wooden Frame With Lumber And Screws
To build the wooden frame, you'll need pressure-treated lumber at least 2 inches thick, a drill/driver, wood screws, and possibly corner braces for reinforcement. Cut the boards to size for your desired bed shape and height. Assemble the boards into a frame, driving 3-inch wood screws through the sides of the panels and into the ends. For a round bed, screw the ends of the boards together at an angle. Brace the corners with metal brackets for stability.
2.Nail Together Pallets And Cover The Bottom With Cardboard
Building raised bed gardens is a great way to maximize your gardening space. One easy way to construct raised beds is to use wooden pallets.
Pallets are inexpensive, sturdy frames perfect for raised beds. Nail four pallets together to form a square or rectangle. Line the bottom with cardboard before filling it with soil to block weeds. The cardboard will degrade over time, adding organic matter to the ground.
Lay stones or bricks in rows and glue them with mortar. Stack them at least 6 to 8 inches high for easier access and weed control. Stone and brick are attractive, long-lasting materials, though expensive. For a rustic look, you can also dry stack stones without mortar.
3.Arrange Cinder Blocks In A Shape And Anchor Them With Rebar
Arrange cinder blocks in a square or rectangular shape for your raised bed. Secure the corners of the bed with rebar that extends into the ground for stability. You can use rebar or stakes in between cinder blocks for extra support.
Cinder blocks provide an inexpensive, durable material for raised garden beds. They come in a standard size, so you can easily calculate how many you need for your desired bed size. Cinder blocks also provide weight to help anchor the bed in place.
4.Cut And Connect PVC Pipes To Form A Frame And Attach Netting Or Wire Mesh
PVC pipes are inexpensive, easy to work with, and perfect for a DIY raised bed. Cut the pipes to your desired dimensions for the sides of the bed. For a typical small bed, 3 to 4 feet high and 8 to 12 feet long sides should work well. Use corner pieces to connect the sides, creating a sturdy box frame.
5.Cut Wine Barrels In Half And Secure Them With Metal Brackets
These repurposed containers make perfect raised bed planters. Cut wine barrels in half and secure them with metal brackets. The curved shape and wooden slats provide visual interest while also being very functional. Since wine barrels are treated to hold liquid, they are naturally rot-resistant and durable outside. You can find used wine barrels at wineries, garden centers, and some home improvement stores for an affordable price. Just be sure to drill some drainage holes in the bottom before using it as a planter.

6.Drill Holes In Tires And Paint Them With Colors
You can find used tires cheaply at auto parts stores or repair shops. Clean them thoroughly, then drill several drainage holes in the bottom of each tire. Flip the tires over and spray paint the outsides in your colors. Once dry, colorful planters will be arranged into a raised bed design. Fill the tires with potting mix and your favorite flowers or veggies. The heavy rubber will last years and hold up well to the weather. Painting the tires protects them from sun damage and hides any writing on the sidewalls.
7.Tie Straw Bales Together With Twine And Sprinkle Fertilizer On Top
Secure the bales by tying them with gardening twine or wire. Place the bales in the desired shape for your garden, spacing them about 6 to 12 inches apart.
Once arranged, sprinkle a balanced, all-purpose fertilizer, like 10-10-10, over the tops of the bales to provide nutrients for your plants. Water the bales thoroughly to help the fertilizer soak in. Let the bales sit for a few days so they can begin to decompose and heat up before planting.
8.Cut Off The Flaps Of Cardboard Boxes And Tape Them Together
Once you have cut off a few cardboard boxes with their flaps, tape the open sides together to create panels for your raised bed. This is an easy, no-cost way to get started, and the cardboard will decompose over time, enriching your soil. You'll want at least four panels for a small raised bed, taping them together at the corners to make a rectangular shape—tape additional meetings around the base to increase the height for more extensive beds.
Cardboard is an excellent material for beginning raised bed gardeners. It's easy to work with, decomposes naturally, and provides weed prevention. Best of all, it's free since you're reusing materials you already have. The only downside is that cardboard won't last as long as wood or stone. But once your garden is established, you can easily replace the cardboard with a more permanent material.
Wrap-Up!
So there you have it, the top simple steps to build your raised bed garden. Now you're ready to get your hands dirty and start growing! Building a raised bed garden is a rewarding project that will provide you with homegrown veggies, fruits, and herbs all season.
Once you've built your garden beds, filled them with nutrient-rich soil, and planted your seeds or seedlings, you'll be on your way to becoming a gardening pro in no time. Happy gardening! May your raised beds yield an abundant harvest.


